Rusty’s Doghouse

Tags

, , , ,

Rusty's dog house

Susan is a groomer who works with Renee at Quick Paws. She has an eight-year old dachshund named Rusty. I believe she has only had him for a year or two, so she adopted him as an adult dog.

Anyway, Rusty has a problem with damaging her apartment while she is gone to work, so he currently can’t be indoors alone while she is gone. With the weather turning colder, this was getting to be a big problem.

Renee came to the rescue by building Rusty a cozy, well-insulated doghouse last weekend. We have many of our own projects that need to get done, but this is one that really made a difference for one cute little dog. The project had the added benefit of using up numerous leftover building materials

Renee did most of the work on this one herself; I only helped out towards then end, when we wrapped things up with the roof. Unfortunately I didn’t get many pictures of this project in progress.

Framing the House and Building Walls

Renee used scrap wood to build a frame for the dog house. She designed it with a little peaked roof, sort of like Snoopy’s house. Since this is for a little dog, she ripped the scrap 2x4s (that is, cut them longways) for the frame.

Roof_rafters.jpg

Birdmouth cuts in the rafters

She did nice little birdmouth cuts for the rafters.

Then she cut foam insulation to size and placed it in the frame. At this point, it would have looked like a little house with white foam walls. She then covered up the sides with the leftover OSB sheathing.

insulated_interior.jpg

View of the interior with lots of insulation

https://muddypoodles.com/wp-content/uploads/2011/10/insulation.jpg

Insulation still exposed before all the sheathing was installed

Jigsaw_for_door.jpg

Cutting the opening

She cut a small opening in the front for the door with a jigsaw, keeping it small to keep as much heat inside as possible.


Weatherproofing the House

tarpapering_the_walls.jpg

Tar-papering the walls

This house needs to be nice and watertight to keep Rusty warm and dry. We had leftover tarpaper from the Great Cat Room Remodel. So she cut pieces of that and used the staple gun to attach them to all sides of the house, as well as the roof.

But a good well-built house needs good, attractive siding. Fortunately we had a big stack of cedar planks that served well as siding. She attached these using long screws.

old_grizzlyfence_countertop.jpg

The old Grizzly Fence countertop that provided the wood for Rusty's dog house

The wood siding was another recycled material. Renee started grooming at Quick Paws back in the spring of 2010. At the time, Quick Paws had just moved into their new location, which used to belong to Grizzly Fence. The room that was to become the groom shop had a large, old countertop covered with cedar fence pickets. We pulled all those old pickets off and removed the countertop to make room for grooming, but Renee anticipated that this wood might come in handy and saved it.

These cedar pickets were substantial, so adding them as siding quickly made the whole house very heavy.

Roofing and Finishing Up

Finally, the house needed a good roof. Unfortunately, we didn’t have any more of the Ondura roofing panels from the Great Cat Room Remodel. We had already donated the leftovers to Home Resource.

So we ended up going back to Home Resource and buying some regular house shingles. We actually bought more than we needed, but it was only $5. They charge $1 per vertical inch of shingles, so I guess we had a 5-inch tall stack of shingles.

The advantage is, this would make the dog house look more like a real house.

I helped with the roof. I was a little surprised to find myself pounding roofing nails again…I had really thought that the cat room remodel was the end of my roofing career. At least for this one there was no danger of slipping and falling off. Although I did have to stand on my toes to reach the nails up near the top of the ridge.

roof.jpg

Shingling the roof

Working with the shingles was pretty easy. They were already the perfect width for the little house, so I just laid them on one after another, starting from the bottom. After placing the first shingle, overlapping the next one covers up the nails, so the whole roof looks nice.

ridge_cap_and_roof

Ridge cap from the side

For the top, we used more shingles to create a ridge cap. The ridge cap is intended to cover the joint where the two sides of the roof meet. There are pre-made ridge caps you can use, but we decided to do the basic version. For this, I cut the shingles into 7-inch strips. Then I installed them along the top of the roof, similar to the way I installed the regular shingles. Again, adding and overlapping each new shingle over the previous one hid the previous nails. When I finished, I thought it looked a little funny because the shingles were still very stiff. However, once the house sits out in the sun and heat, the asphalt shingles should soften and “relax” a bit.

ridge_cap.jpg

Ridge cap from the front of the house

While I worked on the roof, Renee added trim pieces around the door and on all the corners to hide the seams. We were out of the old Grizzly Fence wood by now, so we used some pickets leftover from installing our own fence last summer.

At last, the house was done! The rough wood planks gave it a nice “rustic” barn look, and I happen to think that the shingles look great.

cropped_side_view.jpg

The finished house!

finished_back_view.jpg

Back view of the finished house!

finished_front_view.jpg

Front view - I love the trim around the door!

Delivering the House

When we finally finished, the house was so heavy we had to back the truck right up to the workbench so we wouldn’t have to carry the house very far. We slid it up on the tailgate and carefully drove to Susan’s house; she lives just down the street so it wasn’t a very long drive.

I should have brought my camera but completely forgot. Susan and her roommate were completely blown away by the dog house. I think Susan was amazed that Renee had built something so cool over one weekend! They found a nice spot for it right by the back door.

Later in the week, Susan told Renee that Rusty loves the new house. He goes out in the back yard, does his business, and goes right into the the little house.

So I would say the Rusty’s Doghouse project was a big success!

My November Plans

NaNoWriMoLogoThis November. I am going to attempt to do National Novel Writing Month (more commonly known as NaNoWriMo). For those of you who have never heard of this, this is a challenge to write a 50,000 word novel during the 30 days of November. Does that sound sufficiently crazy? I have never tried this before, but has been going on now since 1999. Check out their Web site for lots of details.

Some Frequently Asked Questions (FAQs)

I’m a technical writer, so it just makes sense to present some FAQs about me, my yet-to-be-written novel, and NaNoWriMo.

Have I written a novel before?

Nope.

Have I at least written fiction before?

Yes, although not for a very long time. I wrote some short stories in college, but not much afterward.

Why am I doing this?

I’ve always wanted to write a novel, but I’ve never been able to have the discipline to sit down and do it. Furthermore, in my past attempts at noveling, there is this “Inner Editor” that starts yelling at me the moment I start. It usually says extremely rude things like “this really sucks, you should just stop now!”

The whole point behind NaNoWriMo is to shut that off, give yourself permission to write crap, and just churn out words. If you write a bunch of crap, well, that’s better than just sitting around writing nothing because you’re so worried about writing crap that you’re completely paralyzed.

I have no idea if this churn-out-the-words approach will work for me, but I think it is worth a try.

The other idea behind NaNoWriMo is that giving you a deadline can help you set aside all the excuses and just write. I’m good with deadlines; I work within deadlines all the time in my professional life, so I’m thinking this extra motivation will help me get moving.

Why right now?

Because I’m 40 years old and I’ve wanted to write a novel since sometime around age 10.

I can come up with a million reasons why now is not a good time. I’ve been doing that forever. Writing a novel was always a “well, someday I’ll get around to that” kind of thing.

And I don’t want it to be a “someday I’ll get around to that” kind of thing anymore.

How will I find the time for this?

Good question. I’m not positive on that point yet. 50,000 words divided by 30 days comes to about 1666 words a day. I’m hoping that I will be able to average more words on some days to make up for bad days. 2000-2500 words a day would be a good goal.

I’m thinking this might cut into my TV and reading time.

How have I prepared?

So far I’ve done a little brainstorming and thinking about what my novel will be about. I also read part of No Plot, No Problem, which was written by Chris Baty, one of the people who originally came up with NaNoWriMo.

What is my novel about?

Right now, I have a very vague plan in mind. I have a character, but I don’t know her name. She has a particular special “ability” (for lack of a better word). This has caused her a great deal of trouble in her life and she is trying to find a way to change or get rid of this ability.

I know a little bit more than that, but that’s all I want to say so far.

Do I have a plot in mind? Have I created an outline?

I have only a vague sense of the plot. I’ve thought of a few events that I think will need to take place at some point in the story. I’m hoping that the pressure of a deadline and the need to write 50,000 words in 30 days will help me materialize a plot out of nothing.

Will I post excerpts as I’m working on it?

Probably not. I think that would probably turn that Inner Editor back on, because I’d want to revise a bit to make it “presentable” first. I don’t think I’ll really have time for revisions if I’m going to finish in time.

But who knows. If a section comes out absolutely brilliant, maybe I will post it. You never know.

Will I at least post about my progress?

Yes! At least, I’m planning on it so far. At the very least I’ll probably post my word count as I progress through the week.

Has anyone ever written anything decent as part of NaNoWriMo?

Yes! There is a long list of published novels that were written as part as NaNoWriMo.

I personally haven’t read any of these so I have no idea if they are any good or not. But I have heard good things about Water for Elephants by Sara Gruen (didn’t they make a movie of that one?). Also, The Night Circus by Erin Morgenstern is currently on the New York Times bestseller list.

Do I have high hopes for doing something great?

Not really. I just want to finish. I’m trying to regard it as novel-writing practice. If I end up with a manuscript I can revise into something worthwhile, that’s great. If it ends up as utter dreck, well, it was just practice and hopefully I had fun along the way, so its all good.

If I start imagining that this is going to turn into a bestseller, I have a bad feeling that the Inner Editor will show up again and I’ll stress out about whether or not I’m writing anything worthwhile. So I’m just not going to go there.

Is this really a good idea?

Honestly, I have no idea. But I’m really hoping that it will be fun!

Pippin Update

Tags

,

A very quick update about Pippin’s adventure in the pool last night.

This morning he was a bit cranky after being cooped up inside all night. But his fur is shiny! It was rainy this morning, so I don’t think it was a huge hardship to be stuck inside. Later, after we opened up his cat door again, I looked out my window and saw him sitting by the pool, leaning over and staring down into the water.

I guess danger kitty didn’t learn his lesson.

Pippin and the Pool

Tags

, ,

So earlier this evening we were out puttering in the cat condo and visiting with the cats. Pippin got bored with us and left, but Xena continued to enjoy pets and scratches behind her ears. Renee worked on some tasks in the greenhouse, getting things ready for moving the pond plants in for the winter.

The dogs fussed in the backyard, complaining that they are not allowed back in the cat condo.

For some reason, I happened to look up right as Pippin came back to the sliding glass door. Water dripped off his fur into a puddle. He was completely soaked.

That goofy cat went and fell in the pool again! And then managed to get himself back out.

When we looked at the pool deck, there were puddles of water right around the pool ladder we installed this summer. So I’m thinking he was clever enough to use the ladder to climb out of the pool. That is a pretty smart cat!

He didn’t seem too terribly traumatized, but took a long time working at cleaning the water off his fur. By the time we left the cats for the evening, most of his body was dry. We helped out a bit with towel and closed the cat flap to lock him in for the night. The cat is pretty smart, but sometimes he doesn’t have too much sense, and I could easily see him roaming around in the cold all night and getting chilled. I know he is going to be cranky by morning since he is used to having the whole yard for his entertainment at night.

This is at least the second time Pippin has taken a swim since we moved in here. Last October he fell in early in the morning while I was working. I looked out the window to see why the dogs were barking and saw a small black shape swimming rapidly across the pool. I had no idea till then that cats could swim so well. He was at the shallow end when I first saw him; by the time I got outside and on the pool deck, he had gone the full length of the pool and was trying to pull himself out.

It was a cold morning in late October, so I didn’t wait to see if he would be successful. I scooped him out, got a towel, and brought him in the house for the rest of the day to get dry and warm. This is a picture from that day:

Pippin warming up after his swim last October

Pippin warming up after his swim last October

This past summer, we saw some suspicious scratches on the side of the pool in the shallow end. I think he might have fallen in and then scratched up the pool wall with his back claws while climbing out. I’m glad he managed to get out that time since we weren’t around.

Pippin, also known as danger kitty!

pippin_at_fence

Pippin the danger kitty!


A Summer of Biking with Dogs / The WalkyDog

Tags

, , ,

Last spring, not long after we bought new mountain bikes, we started taking the dogs on bike rides for exercise. The four big dogs need a lot of exercise. Bicycling with them is a great way to give them really good exercise in a short amount of time.

But biking with dogs isn’t always all that easy. We would take them one at a time—I just rode along while Renee would take the dog on a long leash. I didn’t have the nerve to ride one-handed like that.

So I started looking into other options so that I could take a dog too. We decided to try the WalkyDog. This device has a bracket you attach to the seatpost of the bike. The leash itself is a metal bar with springs inside for shock absorption. It has a quick release so it is easy to attach and detach from the bracket.

Once all set up, you can ride along like normal (while paying extra attention to the dog of course) and the dog can run alongside the bike. He can’t get ahead or behind the tires, although he can get pretty close.

The WalkyDog the day UPS delivered it

First Attempts to Use the WalkyDog (Back in April)

When the WalkyDog arrived, we of course had to get the dogs used to the idea. I was pretty confident that this wouldn’t be a problem since they had all gone on bike rides before. The web site where we ordered it recommended starting slow, hooking up the dog and walking before riding, and so on. Pretty logical stuff.

Abby and Myka

It turned out I was a bit wrong about this. I tried Abby first. As soon as we got near enough to the bike for me to attach the leash, she started backing away. She refused to get close enough for me to connect her to the bike.

So next I tried with Myka. She also freaked out at first, and managed to wriggle completely out of her harness when I connected her to the bike! At this point, Renee came outside to help out. We spent some more time coaxing her to accept the idea. We managed to get her to go on a very short ride, first with Renee and then with me.

My theory on why they freaked out is that they weren’t used to my bike (it is larger than Renee’s) and they weren’t used to the idea of riding with me, since Renee usually took them on her bike.

The Scared-y-Cat Surprises Us All 

So after the rather unenthusiastic response from the first two poodles, I really wasn’t sure what to expect from Darwin. He is, really, a scared-y-cat of a dog. Loud noises and strange things scare him easily. Clang a metal dog food bowl against the floor and he scrambles under the bed.

Darwin waiting for us to start riding again.

So with some concern I put the harness on him, took him outside and brought him up next to the bike. To my surprise, he stayed calm. Connected him to the bike and he just looked around as though saying “well? Are we going now?” Walked the bike around the yard once — barely — and then hit the street. He had no trouble at all, just started running alongside the bike like he had been doing it forever!

So although it was a mixed review from the poodles, Darwin gave the WalkyDog a full thumbs up. Since then, I’ve taken Darwin on many rides, sometimes with Renee and sometimes on our own. I’ve also taken Myka numerous times.

Concerns and Safety

Obviously, there are some risks when bicycling with a dog. All the risks associated with bicycling (traffic, road hazards, and so on) are compounded when you have a living creature attached to your vehicle and running alongside you.

But you know, there are risks in everything. We could get hit by a bus while walking across the street. Our dogs could run off while hiking in the woods and get hurt. There are no end to the bad things that could happen. And the positive aspects of bicycling are just huge. The dogs love it. They get better exercise than on a walk, and they seem to love seeing us “run” at their same pace.

When I first started researching the WalkyDog before we ordered it, I saw a comment online (I can’t remember where) that said this was a terrible idea because it was essentially chaining your dog to a treadmill that could break his neck if he tried to stop. I sort of wonder about someone who says something like this. After all, the bicycle is not powered by some sort of inattentive robot. It should be powered by a human who actually, you know, cares about the dog running along and can pay attention to pretty obvious signals. The “treadmill” in this case can be extremely responsive to the actions of the dog.

When I ride with a dog, the ride is all about the dog. I go the dog’s pace, not my own. When he slows down, I slow down. When he speeds up, I monitor his speed and make sure he’s not overdoing it, although sometimes it is amusing to just relax and let him tow me down the road. The point is, I’m not going to be getting massive amounts of exercise since I am constrained by the needs of the dog.

Ready to go!

I’ve found that it works well to position the WalkyDog so that it is almost perpendicular to the bike, but pushed back just a bit. In this position, I can see Darwin (or Myka) in my peripherial vision at all times. If he slows down and drops back a bit, I see the change immediately and can adjust.

It is also necessary to be extra-alert when biking with a dog. For example, the other night we passed two skateboarders flying down the hill. Darwin doesn’t really like skateboarders very much — they move fast and they make funny noises. He wanted to chase the first one, and so I had to veer sharply the other way to get his attention and get him out of the way of the second skateboarder.

I usually talk to the dogs quite a bit as we ride, which helps keep them calm and helps teach them what to expect. When we make turns, I call out the direction we are going. Both Darwin and Myka now know what “left” and “right” mean. Darwin also knows that “Let’s Go” means he needs to stop looking around at whatever is distracting him and keep moving.

Advantages of Biking with Our Dogs

So far, in 2011 we’ve ridden about 120 miles with the dogs. A few of these rides were before the WalkyDog, but most were after. Sometimes we take two dogs at once, now that I can take a dog too. It is a little more chaotic with two, as they tend to compete with each other a bit. For example, Myka insists on being the lead dog. She does not do well if the other bike and dog are in the lead.

The dog who has benefited the most has probably been Darwin. He can be a difficult dog these days. He loves the poodles and Cricket but is iffy with other dogs, so he can’t go to the dog park for exercise. With bicycling, I can take a short lunch break during my workday and give Darwin a good workout. Then in the evening we can take the rest of the dogs to the dog park.

The best part of it all is, I usually come home from a dog bike ride in a good mood.

On the bridge during an evening ride

The Great Cat Room Remodel Part II

Tags

, , ,

(see part one here)

This year, we decided to solve some of the problems with the cat room — particularly the issues with the temperature and the high energy bill to keep them warm. Also, we really wanted to make it a more comfortable home for the cats, so they could better enjoy living here. In other words, it was time to turn the old shed into a deluxe cat condo.

Renee is already known as the “house project queen.” Since meeting her, I’ve helped with numerous home improvement projects (and I plan to write posts about more of them as well). But I think in some ways this particular project was the largest we’ve done since I met her. We did it over the weekends, and it pretty much took up every weekend in the month of September except Labor day (when we went backpacking), plus the first weekend of October. Not to mention the work that Renee did by herself on her days off when I was at my normal job.

Weekend Number 1: Sept 10-11

The project started innocently enough. We went to Home Resource to see if we could find an inexpensive door to install. Our plan was to frame out the opening of the shed and install a normal door. But we wanted to be sure and include plenty of glass, so that the cats would get lots of natural light.

The shed also has a back room that serves as a greenhouse; last spring we started various seeds back there for the garden. The door between the cats’ room and the greenhouse was a heavy piece of wood on sliding rails that always got stuck. So we also wanted to find a way to fix that and make it easier to get in and out of that part of the room.

Sliding door

The door we missed out on at Home Resource

At home resource, we came across a sliding glass patio door and this gave us a great idea. Instead of framing out the shed opening, we could install a sliding patio door! This would give them a real door, while at the same time still letting in as much light as they had before, AND it would look much nicer than the pieced-together wall we had originally planned. The opening was already about the same size as a standard patio door, so we wouldn’t have to frame anything.

Unfortunately we made the mistake of running over to Home Depot to price new patio doors first. When we came back to Home Resource, the sliding glass door was already sold. Note to self: when you find the perfect item at Home Resource, either just buy it right away or at least put down a small deposit and have them hold it. NEVER just walk away!

old windows

The old windows

It was still a productive weekend. We put a new closet-type sliding door between the cats’ room and the greenhouse and replaced one of the windows in the shed with one we found at home resource.

The new windows

New windows

Later in that week, Renee picked up some nice tile from Home Resource (only spent about $10!) and tiled the countertop in their room. It made a HUGE difference! She also dug around and found some leftover paint and started painting some of the walls, which also helped lighten up the room.

New Tile and Paint

New Tile and Paint

Weekend Number 2: Sept 17-18

The second project weekend was mostly about cleaning up. We had old plastic roofing panels that we had never finished installing the previous year. We pulled those out to return to Home Depot. We also bought a new sliding glass door since we missed out on the great Home Resource find. Just a note: sliding glass patio doors are HEAVY!

New door

Buying the new door

We also cleared out all the bales of straw, cleaned and organized, and did some more painting. The material for some of the walls had been damaged and stained due to water leaking in, and it was also pretty much just rough wood. It soaked up a lot of paint and took multiple coats to really cover.

I think the area in which we planned to install the sliding door had once been used for some sort of old pocket door. It was just hollow space. So we took apart the walls and installed real insulation. This was a messy, unpleasant job but it was satisfying to see the finished walls and know that they cats would be warmer this winter! I also got to spend lots of time fighting to unjam and reload the staple gun. That part was not especially fun.

Stapling

Installing insulation

On the Ladder

Renee ignoring all the safety warnings on the ladder.

Finally, it was time to work on the door. We wanted to install a 2×6 across the threshold for the new sliding door to rest on. This meant we needed to fasten the wood directly to the solid concrete floor. We used a Ramset tool for this. This is a powder fastening tool. To use it, you load a special nail, then load a special .22 caliber bullet. The tool acts like a gun, using the power of the bullet to drive the nail.

Ramset 1

Firing the Ramset to fasten the wood to the concrete.

Ramset 2

Renee's turn with the ramset.

We ended up installing the 2×6 twice. The first time we were both essentially practicing with the Ramset since neither of us had ever used one before. I have also never fired a gun before, so the kickback was a bit of a surprise. We discovered after installing the wood that some of the nails had  bent and were not holding it securely, so we pried them out and did it a second time.

The second time we did a much better job driving the nails straight into the wood and concrete. That wood is NOT going to budge anymore.

At last it was time to fit the door into place. I should mention that earlier in the summer, we installed a new back door on the house and it was a painful, difficult process that nearly caused a divorce. I had sworn I would never install another exterior door, but here we were, doing the same thing. So I was a bit nervous about this process.

We positioned the heavy patio door in place (moving heavy objects is NOT my strong suit), pushed it up, and…discovered that the opening was a hair too short. Despite all the measuring we did before purchasing the door. The door would have to wait until Renee could cut out the header and move it up a bit.

We cleaned up the huge mess in the room so that the cats could be a bit more comfortable in the meantime.

Finished Up the Door During the Week

During the week, Renee worked out there on some smaller projects after work. She fixed up some of the wiring and installed nice new light fixtures (also from Home Resource).

The door!

The door is finally installed!

Finishing installing the door was actually somewhat anti-climatic after all my angst over it. On Thursday (Renee’s day off), she cut out the header and moved it up to accommodate the new door. When I finished my real work for the day, I helped out. Once again, we hefted the door into place, set the bottom on our 2×6 and pushed the top up into place. This time it fit perfectly.

 Celebratory pizza

Celebratory pizza

We had a little trouble adjusting things with shims. We over did it the first time and the door became “off” enough that it would not slide smoothly. So, we pulled all the shims out and started over. The second time it worked, so once we were satisfied that everything was nice and level, we drove screws in all around the door. And it was finally in place.

We celebrated with homemade pepperoni, mushroom, and green chile pizza.

Weekend Number 3: Sept 24-25

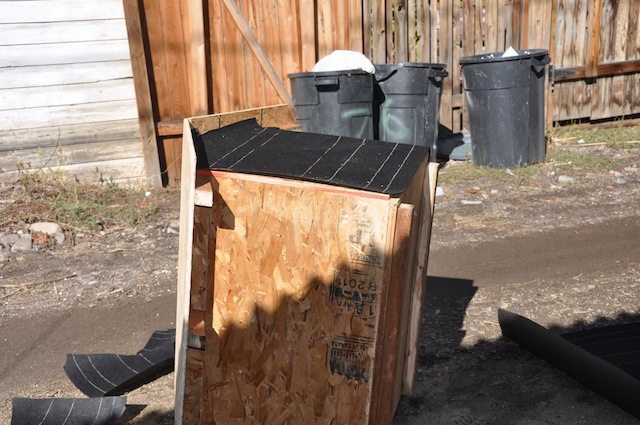
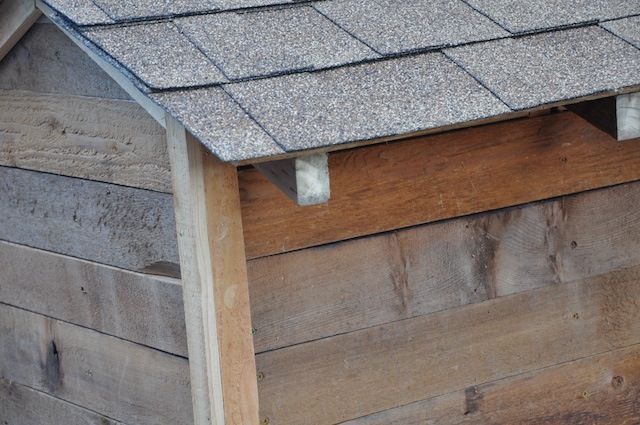
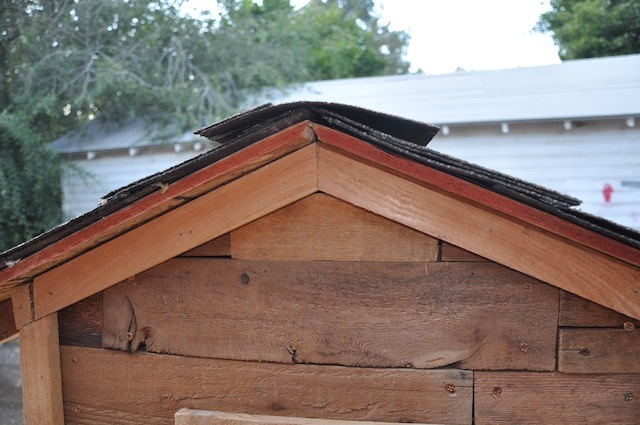
The third weekend was for the big job: installing the new roof.

Old roof

The really crappy old roof

We had special ordered this Ondura roofing product from Lowe’s. Late in the week we got the call that it was in, so Renee picked it up and stacked in the shed area. It is a corrugated product, made out of asphalt. It looks and feels considerably more durable than the old plastic and fiberglass panels that had been up there before. We got mostly brown panels as well as a few of their translucent skylight panels so that both the greenhouse and the cats could have some natural light.

We wanted to do it right this time. I really don’t want to have to install this roof ever again. It had better last.

toony

Toony helping install sheathing

Our friend Toony came over to help, which was huge (Thanks, Toony!).

We started with replacing the rafter at the far end of the roof. The old one was rotted and nasty.

Then, we pulled down all the old panels and installed OSB (Oriented Strand Board) sheathing. Just this alone made a huge difference; we could finally walk around on the roof without having to balance on the rafters!

OSB walking down the alley

OSB walking down the alley

I somehow ended up with the job of pulling the old nails and screws out of the old panels and stacking them up neatly as Renee and Toony pulled them off and tossed them off the roof. At one point, I looked up and saw our neighbor Ron from two houses down. He came down the alley carrying a hammer, safety glasses, and a pair of gloves and said “put me to work.”

Do we have the coolest neighbor or what? This is the same neighbor that would run his snowblower down the sidewalk for our entire block last winter. He would also take a short detour with it to clear our driveway. Really just an amazing guy. He and Renee occasionally get to chatting and exchanging war stories (literal war stories — Vietnam for him and Iraq and Afghanistan for her).

He helped out all the rest of that day and all day Sunday too.

We finished up Saturday by getting all the sheathing up and ready for the new roof.

Ron and Renee

Ron and Renee at the end of the day

Skylight windows

Skylight windows

Sunday was a very, very long day. We cut openings in some of the OSB panels for skylights. It was a little creepy walking around on the roof once it had gaping holes in it.

Ron worked on installing fascia board along the eaves. He also painted it for us and installed the new drip edge.

tar paper

Renee with the tar paper

We rolled out sheets of tar paper across the OSB and stapled it down. For this job, we used a stapler that is shaped sort of like a hammer, and you smack it into the material to inject the staples. I somehow managed to take over this job. I found it entertain to walk down the length of the roof, whacking it over and over with my staple gun. (it was also around this point when we were too busy to take any more pictures…so no more pictures.)

Finally it was time to start installing the actual roofing panels. The panels were pretty easy to move around and position on the roof, but nailing them in place was very time consuming. For the nine skylight panels, we had to pre-drill holes in the panels first, then drive in 4-inch roofing nails. For the regular panels, at least we didn’t need to pre-drill, so it went a little bit faster.

It was getting dark by the time we finished.

The next day I felt like I had been beat up, or taken part in a really hard workout. My whole body was sore!

Weekend Number 4: Oct 1-2

Finally the project was winding down, but not quite done yet. We weren’t able to find another good, correctly-sized window at Home Resource, so we just bought a brand new one from Lowes. We are getting to be pros and installing windows — way easier and quicker than doors.

Once the window was in, Renee added brick moulding trim all around it and painted it with our green accent color. This completely dresses up the outside of the shed.

Now that we had a real roof on the shed, we could add insulation in the ceiling as well. This winter, the heat won’t all be escaping through the roof! Installing insulation in the ceiling was more difficult than installing it in the wall since the pieces had a tendency to flop around and land on our heads. I definitely recommend safety glasses during this task to keep that crap out of your eyes!

Also, our rolls of insulation were not really wide enough for the areas we were filling in. Renee originally bought them with something else in mind, but we really wanted to use as much existing materials for this job as we could. So we made it work.

For the first couple sections, we installed the wider section of insulation, then cut a narrower piece, stapled it in place, and taped the two sections together. However, this was rather difficult and involved a lot of reaching over our heads and fighting with the insulation. Finally we came up with the idea to do the cutting and taping on the floor first, then fit the full piece into place. This worked out MUCH better and faster. Pretty soon the whole roof was nearly done.

We ran out of insulation before we could do the last, smaller sections right around the skylights. We also still need to add sheetrock to cover up the panels. Eventually I would also like to install some nice double-paned glass over the skylight panels to help insulate a bit more.

We also did more painting. The old wood walls just soaked up the paint and required several coats to fully cover. But the end result was great — no more dark, reddish stained walls, but a nice bright interior instead!

Finally after all the insulation, painting, and cleanup, we rolled out a nice blue indoor/outdoor carpet we bought from Home Depot. This is the finishing touch that really made it feel like a room, and no longer a “shed.” No more ugly concrete for the cats to walk on — now they have wall-to-wall carpeting!

But What Do the Cats Think?

Pippin in his bed

The homeowner is getting cranky about how long this remodel is taking. "Can't you contractors speed it up? How much am I paying you?"

Like most homeowners living in their home during a big remodel, the cats did not really enjoy the construction process at all. There was just too much noise, dust and clutter! After the first couple weekends, they did get somewhat used to it. Xena would just hunker down in her crate and ignore all the activity. Pippin would go out to the patio and hang out with the dogs or sleep in his favorite chair in the shade.

But once the remodel was complete, the cats decided it was worth all the trouble and inconvenience.

Pippin likes to lay on a little mat in front of the new window. He can actually see out now, and it is no longer drafty.

Pippin in Window

Pippin approves of his window seat

When we go out to visit the cats each morning, Xena now comes right out of her crate and asks for pets. She likes walking and rolling around on the nice clean, soft carpeting.

We picked up a pet door designed for sliding glass doors for about five dollars at Home Resource (a great find as these run about $150 new!). We still need to replace the flap, but in the meantime, Renee designed a temporary flap to hold in some of the heat. Pippin has gotten practice going through the door. I don’t know if Xena will try going in and out, but hopefully she will give it a try if we have any nice warm days before winter sets in.

Tile

Love the new countertop

New carpet

New carpeting

It feels like we really finished this just in time. Late last week it started getting pretty chilly at night, so we setup the heater in their room. It is nice walking in there now and feeling no outside chill.

Geraniums

The cats even have house plants!

Cats in Sun

Xena and Pippin in the Sun

It is obvious every time we go out there that the cats are much happier now. They no longer live in a shed, or in a straw-filled barn. They live in their own private condo, and they love it!

Cats soaking up the sun

Cats soaking up the sun

There were more pictures than I could fit into this post; if you want to see them all, visit my Great Cat Remodel photo set at Flickr.


October Evening

Tags

,

October Evening River

October Evening River

Myka trots alongside Renee’s bike, sometimes glancing up as if to say “am I doing this right?” She is, of course. She loves running alongside a bike.

It is an October evening. Cool, crisp, clear. It reminds me of why October is usually my favorite month. Not yet really cold, no longer the heat of summer. The scent of fallen leaves in the air. Renee and Myka are just a little ahead of me. We ride down Rollins to Beckwith.

My pants nearly catch in the bicycle chain, so I pull them up to my knee and expose my leg to the chilly air. It occurs to me that this is very different from the bicycling I used to do, years ago. I was never a particularly fast cyclist, but I used to at least dress the part. Now I can’t remember the last time I wore bicycling shorts. I haven’t pulled out my road bike in ages…it is always the sturdy mountain bike, able to hop across potholes and stop suddenly if the dogs demand it.

All my bicycling these days is always all about the dogs. We go at their speed — usually 6 to 12 miles per hour or so. We go just a few miles total. I love watching them trot along, so excited that we are finally going their speed, finally pulling our own weight and keeping up with the pack. Sometimes we each take a dog — Renee takes Abby or Sirus; I take Myka or Darwin. But tonight it is just Myka, out for some special one-on-one time.

I love the fact that there is no planning, no preparing. We just finish up whatever we are working on, grab the bikes from the garage, a dog on a leash, and head down the street. Even wearing pants that you have to pull up to your knee to keep the cuff out of the chain.

We leave the street at 1st street and turn onto the bike path. There is a bit of a hill here and Myka kicks it up to 15 mph. We cruise the rest of the way down to the river and head over to the Riverfront Trail Bridge. We stop at the middle to take in the river view. The area all around the bridge is littered with graffiti, but the view from the middle is great.

Myka shuffles about on her leash. I take phone pictures, but she blends in with Renee’s black pants. Maybe I can fix the exposure on the computer later. It doesn’t matter. We soak in the view, then head back, turn our ride into a little 3+ mile loop. Myka adjusts back to her “prancy trot.” She is too cute; I wish I had a handlebar-mounted video camera.

It is getting dark as we pull into the driveway at home. We have too much to do; cold weather is coming. We need to take the trailer in to be winterized. We should have packed it up today to get it ready, but we didn’t have time. We need to set up a tank in the greenhouse to save the pond plants before it gets too much colder. We spent the last month working on making a comfortable, warm home for the cats. It is overwhelming to think of it all. October is my favorite month, but it is brief and full of things that must be done before winter hits. It can be hard to stay in the moment and not panic.

But right now, it is a perfect October evening and the most perfect thing to do was take Myka on a bike ride.

Myka and Renee on the Bridge

Myka and Renee on the Bridge

By the River

By the River

The Great Cat Room Remodel – Part I

Tags

So I named the blog Muddy Poodles, and yet my first really long post here is not going to be about dogs, but rather, the cats. Xena and Pippin.

How Did I End Up with Cats?

I never used to be a cat person. Growing up, we always had dogs. I remember my dad commenting that he didn’t like cats because they “jump up on the stove and lick the butter.” I thought this was a little silly at the time since we didn’t keep the butter out on the stove where it could be licked, but I think he really just didn’t like the independence of cats and the fact that you really can’t train cats.

When I was with my ex-partner Laura, I somehow became the owner of two cats: Pippin and Xena.

Xena as a Kitten

Xena as a Kitten

My dad not currently worried about the butter

My dad not currently worried about the butter

We got Xena back in 1997 when we lived in Oak Brook, Illinois. She is a full siamese. From the time she was a kitten, she often seemed more “dog-like” than cat-like. She wasn’t much into jumping up on things or climbing.

Baby Pippin Looking Innocent

Climbing

Climbing

Pippin came along after we were living in Montana. He is some sort of random domestic short-hair mix. He came from one of Laura’s co-workers when their cat unexpectedly had kittens, so we had no idea who his parents were. He was, unlike his sister, completely cat-like, which was a bit of a surprise to me since I was used to Xena and her non-cat ways. He climbed and jumped. He loved climbing on the little cat-tree we got him. He quickly learned how to jump up on the countertops. I’ve no doubt that he would have happily licked the butter if we had left it out on the stove.

He was also the devil cat from day one. He chewed up my dining room chairs. Once, I came downstairs and found my cell phone with the charger cord dangling out of it like a little, frayed tail. The other end of the charger was still plugged into the wall. Glad he didn’t electrocute himself while chomping through the plugged-in charger.

The damaged chairs

The damaged chairs

I think Pippin was never meant to be an indoor-only cat. He just got too bored being cooped up all the time.

At Renee’s House

Fast forward a few years. Laura and I had broken up, I was now with Renee, and we decided to move in together after about a year. This presented a bit of a problem with the cats. Between the two of us we had (at the time we moved in) five dogs. Three of which were standard poodles. Sirus (the cream poodle) saw cats as prey and chased them whenever she had the chance at my house. So combining households was going to be challenging.

Our solution was to set up the shed in the backyard to be a home for the cats. It wasn’t perfect or ideal, but it mostly worked. We cleared out the various gardening tools and things, moved in a big pet crate with a big fluffy comforter, and tried to make it as comfortable for them as we could.

This solution worked, but had some definite drawbacks. It didn’t have a good solid door, so we tacked up some heavy plastic for the winter and got a small heater for them. This kept the chill out of the room, but significantly jacked up our electric bill. We also got some bales of straw to provide shelter from the cold, but the cats did not really like feeling as though they lived in a barn.

Pippin in the pond area under the pine tree.

Jungle cat on the prowl!

On the other hand, there were several good things about this solution. Pippin loved having full access to the outdoors. Once he got over his initial anxiety about being moved, he started exploring the backyard. We have a tall fence and as far as I know, he has never managed to escape into the greater outdoors. But the backyard has become his personal kingdom.

The squirrel liks to tease the dogs and pippin

The dastardly squirrel

He loves to watch birds in the trees. I don’t think he’ll ever catch one (they have become smart), but he stalks them. It is pretty funny to see him, as he makes an odd little chittering sound when he watches them. He does the same thing with squirrels. He’s as interested in watch the squirrels as the dogs. In fact, I think that may have helped him and the dogs learn to get along since they actually have something in common with each other.

Sirus and Pippin Negotiating a Truce

Sirus and Pippin Negotiating a Truce

Speaking of the dogs, the turn-around has been amazing. We keep an eye on Sirus because she sometimes still regards him as prey. But he is no longer afraid of the dogs. He stands his ground when he is out and just refuses to BE chased anymore. It is great to see him strutting around the yard, even when the dogs are out and about, with no signs of fear. The dogs have learned to respect him and mostly leave him alone.

Cats on the Deck!

Cats on the Deck!

Xena has also adjusted to her new home. She doesn’t enjoy the outdoor access quite as much as her brother, but over the summer she did sometimes come out and lounge on the pool deck in the sun.

Still, we clearly needed to do something to solve the drawbacks mentioned above…

To be continued in The Great Cat Room Remodel: Part II.


Why a Blog?

Well, why not?

Short answer: sometimes a Facebook status just isn’t enough. I need more words to blather on!

Longer answer: I’ve been meaning to get back to blogging now for a long time. I actually did have a blog several years ago. I started it in 2004 and sort of tapered off on posting in 2006. I never had much of a readership, but I did like having a place to express all my thoughts on many different topics. I wrote about my life, my pets, politics, gay and lesbian issues, and other random stuff. I moved from Illinois to Montana during the time I was blogging, so I wrote all sorts of posts about that too.

I got busy with all sorts of other things and stopped posting very often. Although I COULD go back and continue with that same blog, it seems sort of silly. I’d rather just start fresh. My old posts are probably full of spam comments by now. Plus, “Muddy Poodles” is a MUCH better blog name than my old blog. I never really did like the name I picked for the old one…it was very boring.

Once I had the name Muddy Poodles in my head, I needed a use for it. Hence, a blog!

Finally, I’ve also been meaning to get back to doing more types of writing beyond the technical writing I do for a living. A blog seems like a good way to do that (and a good way to motivate myself to write more often).

I recently ran across a series of posts about reasons to start a blog, and I have to say a few of them did jump out at me:

I don’t expect that I’ll have very many readers, and I’m really not going to worry about that. This is all just for me to have fun.

Design a site like this with WordPress.com
Get started